(Raceways, In-Wall Kits, and Safety Tips)
Visible TV cables can make even a nice living room look messy. The good news: you can get a clean, “mounted-TV showroom” look without doing anything sketchy—as long as you pick the right method and follow basic safety rules.
This guide covers the three most practical approaches: raceways, in-wall kits, and furniture-based hiding, plus the safety tips that actually matter.
Start Here: The 60-Second Plan
Before buying anything, answer these:
- Is your TV wall-mounted or on a stand?
- Is your wall drywall, brick, or concrete?
- Where are power outlets located? (directly behind TV? down low? to the side?)
- How many cables? (power + HDMI + console + soundbar + antenna, etc.)
These decide whether you need a quick cosmetic fix (raceway) or a true in-wall solution.
Method 1: Cable Raceways (Fastest + Cleanest for Most People)
Best for: renters, quick upgrades, drywall or painted walls, minimal tools
What it is: a paintable channel that sticks to the wall and hides cables inside.
Why pros use it
- Looks clean immediately
- Easy to install, easy to adjust later
- You can run cables vertically down from the TV to the outlet area
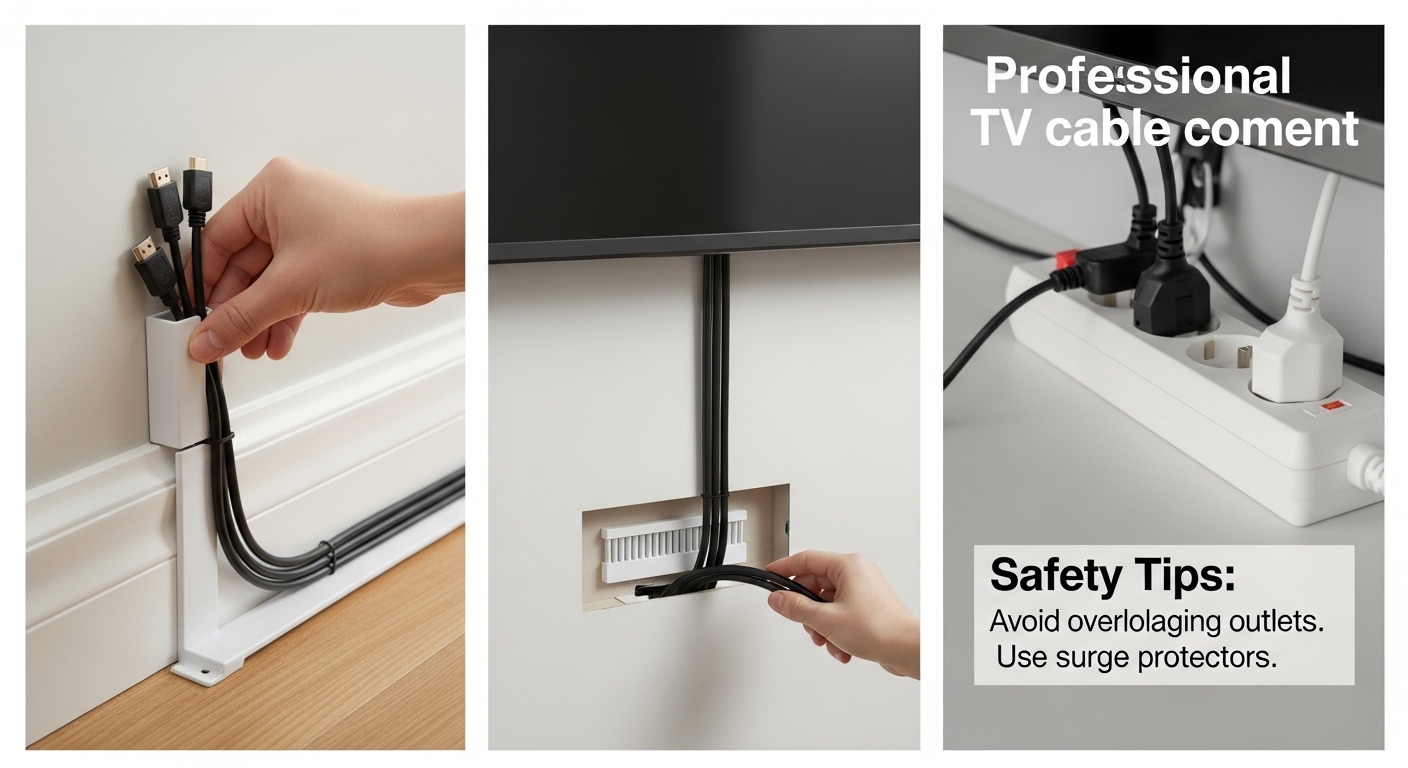
How to do it right
- Map your cable path with painter’s tape (straight lines look best).
- Clean the wall where adhesive will go (dust ruins adhesion).
- Install the raceway in sections, using a level.
- Put cables inside, then snap the cover on.
- Paint to match wall (optional, but it’s the pro move).
Pro tips
- Use one wider raceway instead of multiple skinny ones (looks more intentional).
- Leave slack behind the TV for adjustments (don’t pull cables tight).
- If you have a soundbar, plan a second small raceway for that cable route.
Downside: You’ll still see a subtle vertical strip—just much cleaner than loose cables.
Method 2: In-Wall Cable Kits (Most “Pro” Look)
Best for: homeowners, permanent setups, wall-mounted TV, drywall
What it is: a wall pass-through system that lets cables run inside the wall and pop out near the outlet.
Why it looks best
Nothing is visible except the TV. It’s the cleanest result.
The safe way to do it (important)
A proper in-wall kit typically uses:
- A top opening behind the TV
- A bottom opening near the outlet/console
- A protected channel for low-voltage cables (HDMI, optical, Ethernet)
Key safety rule (non-negotiable)
Do NOT run a standard TV power cord inside the wall unless the cord is specifically rated for in-wall use.
The safe approach is:
- Use an in-wall power solution designed for this purpose, OR
- Keep power outside the wall and only run low-voltage cables inside.
If you’ve ever seen a “perfectly hidden” setup that shoved the power cord inside drywall—yeah, that’s the part you should not copy.
How to do it right (high-level)
- Use a stud finder to avoid cutting into studs.
- Mark the top and bottom openings.
- Cut carefully and install pass-through plates.
- Run low-voltage cables through the wall.
- Use a proper in-wall rated power solution if you want zero visible power cabling.
Downside: More tools, more commitment, and you need drywall access.
Method 3: Behind-Furniture Hiding (Best for TV Stands + Consoles)
Best for: TVs on stands, rentals, no wall cutting
What it is: hiding cables behind a media console, using ties/clips and routing them to be invisible from normal viewing angles.
Why it works
Most people view the TV from the couch, not from behind the console. Good cable management just makes the front view clean.
How to do it
- Group cables by device (TV, console, soundbar, streaming box).
- Use Velcro ties to bundle each group.
- Route bundles along the back edge of the console using adhesive clips.
- Leave drip loops and slack so cables aren’t stressed.
- Hide the power strip inside the console or in a ventilated cable box.
Downside: Not as “floating TV” clean as in-wall, but it’s safe and practical.
The Pro Checklist: What Makes It Look “Done”
- Cables run in straight vertical/horizontal lines, not diagonals
- No cable spaghetti behind the TV (bundled with Velcro, not taped mess)
- Power strip hidden but still accessible
- Enough slack for moving the TV or plugging new devices
- Labeling (optional but elite) for HDMI/console cords
Safety Tips (Please don’t skip these)
✅ Do
- Use surge protection for TV + consoles
- Keep cables away from heat sources (heaters, radiators)
- Leave airflow around power bricks and consoles
- Use Velcro ties (easy to adjust), not tight zip ties that crush cables
- Keep low-voltage cables separated from power when possible (reduces interference)
❌ Don’t
- Don’t run a regular power cord inside the wall
- Don’t overload a power strip (especially with heaters)
- Don’t pinch cables behind the TV mount
- Don’t bundle power bricks tightly—heat buildup is real
- Don’t route cables where they’ll be stepped on or crushed by furniture
Choosing the Best Method (Quick Decision)
- Want fast and renter-friendly: Raceways
- Want the cleanest “pro” look: In-wall kit (done safely)
- TV on a stand / easiest everyday option: Behind-furniture routing
Bonus: My “Cleanest Look with Least Effort” combo
For most living rooms, the best balance is:
- Raceway down the wall +
- Cable management behind the console +
- A hidden surge protector/cable box
It looks nearly pro, takes an afternoon, and stays safe.